How to rip DVDs | How to set up a fileserver on Invision MIRC | How to connect to Shocking Moviez
Shocking Moviez's Guide to Ripping DVDs using FlaskMPEG
Please be patient while this guide loads...it may take up to one minute (or more)
TO START, YOU WILL NEED...
A. The Shocking Moviez FlaskMPEG DVD-Ripping Package. This contains:
a. FlaskMPEG 0.594
b. Smart Ripper 2.34
c. FHG Radium Mp3 Codec
d. DivX Codec 3.11 Alpha
Download the Package by clicking here (about 3 MB)
B. This guide (you can download a Microsoft Word version of this guide here)
PART I - Copying the DVD to your hard drive
1. Unzip and install the DivX and Radium Mp3 Codecs and restart your
computer!
2. Unzip Smart Ripper
3. Put DVD in drive and run the movie for a few seconds in your normal DVD
playing software
(this unlocks the drive so Smart Ripper can copy the movie).
4. Open Smart Ripper.
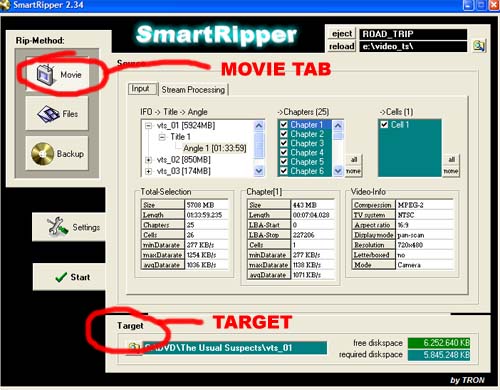
5. In the 'Movie' tab (under Rip-Method) select the desired directory for the
'Target' (Figure 1-1)
(FIG 1-1)
6. Next, go to the 'Files' tab and press "all." (Figure 1-2)
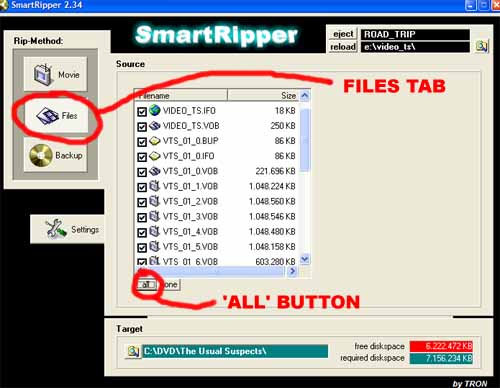
(FIG 1-2)
7. Press "Start" under "settings" and rip away!
PART II - Converting the DVD to a readable movie file
8. Unzip and open FlaskMPEG
9. Under the "File" menu, select "Open DVD"
10. Go to the directory you ripped the DVD VCD files to and select the .ifo
file for the DVD. Then, press 'Flask this DVD' with the default options
selected. (Figure 1-3)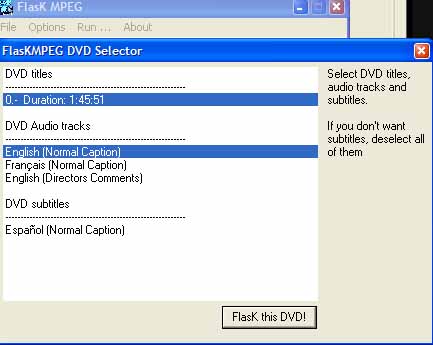
(FIG 1-3)
11. Before you go any further, make sure 'AVI Output' is selected under the
"Select Output Format" under the Options Menu. (Figure 1-4)
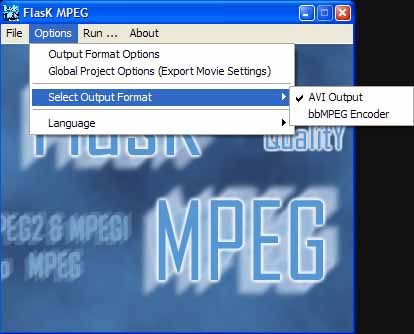
(FIG 1-4)
12. Under the Options menu, select "Output Format Options"
13. For Video, press "Select Codec" and select "DivX :-) MPEG-4 Fast-Motion"
from the list.
14. Press "Configure.."
15. For the first slider, make the Smoothness/Crispness about 75% (Figure 1-5)
16. Depending on the movie and how many discs you want the movie to take up, you
will want the
Data Rate different. For example, an 1 1/2 hour movie would be anywhere from
1200-1600 kbps.
Tinker around with this setting if your DivXed movie is too large or too small.
(Figure 1-5)
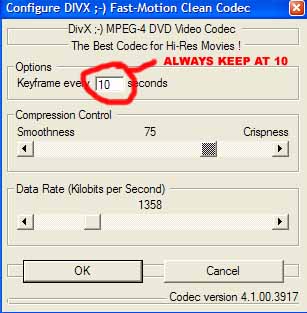
(FIG 1-5)
17. Press "OK" twice to get back to the Output Format Options.
18. Press "Select Codec" under Audio this time.
19. For the 'Format' choose MPEG Layer-3 (Figure 1-6)
20. For the 'Attributes' choose either 160 kBit/s, 128, or 112. (Figure 1-6)

(FIG 1-6)
21. Press "OK" twice to get back to the main Flask window
22. Now, select "Global Project Options" under the Options menu.
23. On the Video Tab, make sure 29.9 fps is selected in the Time Base menu.
(Figure 1-7)
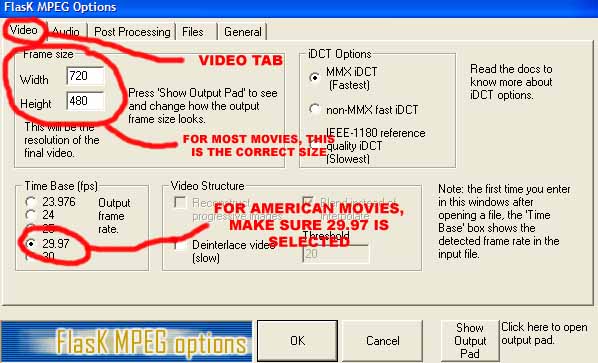
(FIG 1-7)
24. On the Audio Tab, select "Decode Audio" for the Audio mode and
for the sampling frequency, select either "Same as input" or "48000 Hz" (Figure
1-8)
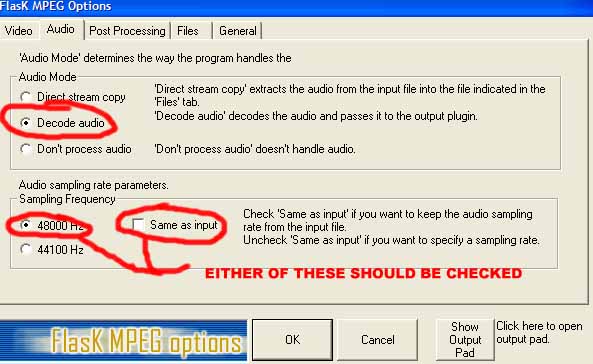
(FIG 1-8)
25. On the Post Processing Tab, make sure "HQ Bicubic Filtering," "Keep
Aspect Ratio," "No Crop," and "No Letterboxing" are all selected (all checked)
(Figure 1-9)
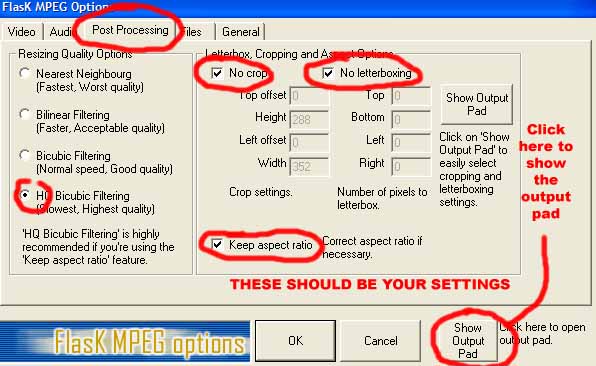
(FIG 1-9)
26. Under the Files tab, simply select the directory you want your movie to be
saved to.
27. Before you exit, click "Show Output Pad" (Figure 1-9) just to make sure that
the settings look OK
(Press Hide to close the output pad window).
28. Press OK to return to the main Flask screen.
29. From the Run... Menu, select "Start Conversion" (Figure 1-10)
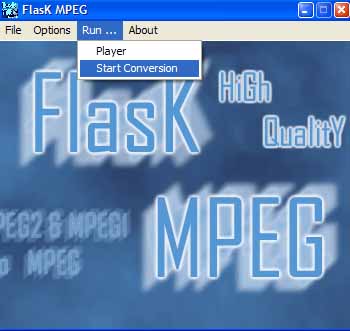 (FIG 1-10)
30. Normally Flasking takes 6-10 hours, so run it overnight. If it takes longer,
just pause it!
31. Burn the movie to a CD.
Good Luck!
i687
shockingmoviez@gmx.net